Evaluating Your Laptop's Graphics Processing Unit (GPU) Capabilities
Before purchasing new cables or screens, you must evaluate whether your laptop's hardware can handle three external displays. Many modern computers can output to multiple monitors, but the exact limit depends heavily on your graphics processing unit (GPU). Integrated graphics solutions, such as Intel Iris Xe or AMD Radeon graphics, share system memory (RAM) and have strict hardware limitations on the total number of display pipelines. For instance, many older or entry-level integrated chips only support a total of three active displays. In this scenario, if you want to run three external monitors, you would have to disable your laptop's built-in screen entirely.
To verify your GPU's exact display limits, you should consult the manufacturer's official specifications. For Intel processors, you can look up your specific CPU model on the Intel ARK database to find the 'Max # of Displays Supported' specification. For AMD Ryzen chips, check the processor's detailed product page. If your laptop features a dedicated GPU, such as an NVIDIA GeForce RTX or AMD Radeon RX series card, it will generally have much higher bandwidth and support more concurrent displays. However, the physical routing of the ports on your laptop's motherboard can still limit native output, making external hardware adapters necessary.
Sources: support.microsoft.com
Decoding Port Standards and Bandwidth Requirements
Understanding the physical ports on your laptop is only half the battle; you must also understand the standards and bandwidth limits of those ports. Common video outputs include HDMI, DisplayPort, and USB-C or Thunderbolt. Each of these ports has gone through multiple generational updates, each offering vastly different maximum resolutions and refresh rates. For example, an older HDMI 1.4 port is limited to 4K resolution at a sluggish 30Hz or 1080p at 144Hz, whereas HDMI 2.0 supports 4K at 60Hz, and HDMI 2.1 can handle up to 8K at 60Hz or 4K at 120Hz.
DisplayPort (DP) is generally preferred for multi-monitor setups due to its superior bandwidth capabilities. DisplayPort 1.4 supports Display Stream Compression (DSC), which allows high-resolution video to be compressed visually losslessly to fit within the port's bandwidth. USB-C ports that support DisplayPort Alternate Mode (Alt Mode) allow video signals to pass directly from your GPU over a USB-C cable. Thunderbolt 3 and Thunderbolt 4 ports utilize the same physical USB-C connector but guarantee a massive 40 Gbps of bidirectional bandwidth, which is essential for driving multiple high-resolution displays from a single port. The latest Thunderbolt 5 standard pushes this even further, offering up to 120 Gbps of bandwidth for extreme multi-monitor configurations.
Sources: vesa.org
The Crucial Role of Multi-Stream Transport (MST) in Windows
If you plan to connect multiple monitors to a single port on your Windows laptop, you must understand Multi-Stream Transport (MST). Introduced in the DisplayPort 1.2 standard, MST allows a single video source to transmit multiple independent video streams simultaneously. This technology enables two primary configurations: daisy-chaining and MST hubs. Daisy-chaining involves connecting your laptop to the first monitor's DisplayPort input, then connecting that monitor's DisplayPort output to the second monitor's input, and so on.
Alternatively, an MST hub or compatible docking station can split a single USB-C or DisplayPort connection into multiple HDMI or DisplayPort outputs. When selecting a dock or hub for a Windows laptop, ensure it explicitly supports MST. Without MST support, your laptop will fall back to Single-Stream Transport (SST), which only supports mirroring a single desktop image across all connected screens rather than extending your desktop into a true multi-monitor workspace. Note that macOS does not natively support MST, meaning Mac users cannot use MST hubs to extend their displays.
Sources: vesa.org, support.microsoft.com
Choosing the Right Docking Station: Native Alt Mode vs. DisplayLink
Because most modern laptops do not feature three separate built-in video output ports, a docking station or multi-port hub is typically required to achieve a triple-monitor setup. When shopping for a dock, you will encounter two fundamentally different technologies: Native Alt Mode (including Thunderbolt) and DisplayLink. Native Alt Mode docks pass the raw video signal directly from your laptop's GPU to the monitors. These docks offer the best performance, zero latency, support high refresh rates, and are fully compatible with High-bandwidth Digital Content Protection (HDCP), which is required to stream protected content from services like Netflix or Prime Video.
In contrast, DisplayLink docks use a proprietary software driver on your laptop to compress video data and send it over standard USB data channels to a hardware chip inside the dock, which then decompresses the signal and outputs it to the monitors. The primary advantage of DisplayLink is that it bypasses the native GPU display limits of your laptop, allowing you to connect three external monitors even if your laptop's GPU natively only supports one or two. However, the trade-offs are significant: DisplayLink increases CPU and RAM utilization, introduces minor latency (making it unsuitable for fast-paced gaming), and does not support HDCP, meaning streaming apps may display a black screen.
Sources: www.synaptics.com
Setting Up Triple Monitors on macOS: Overcoming Apple Silicon Limits
While this guide focuses heavily on Windows, many users attempt to configure triple-monitor setups on Apple laptops. It is crucial to understand that Apple Silicon chips have strict native external display limitations that vary by generation and chip tier. The base M1 and M2 chips natively support only a single external display. The base M3 chip improved on this by supporting up to two external displays, but only when the MacBook's lid is closed in clamshell mode.
Crucially, the base M4 and M5 chips (available on both MacBook Pro and MacBook Air models) natively support up to two external displays simultaneously with the laptop lid open, allowing for a total of three active screens (the built-in display plus two external monitors). For higher-tier chips, the M1/M2/M3/M4 Pro chips natively support up to two external displays (while the M5 Pro supports up to three). The M1/M2/M3/M4/M5 Max chips natively support up to four external displays.
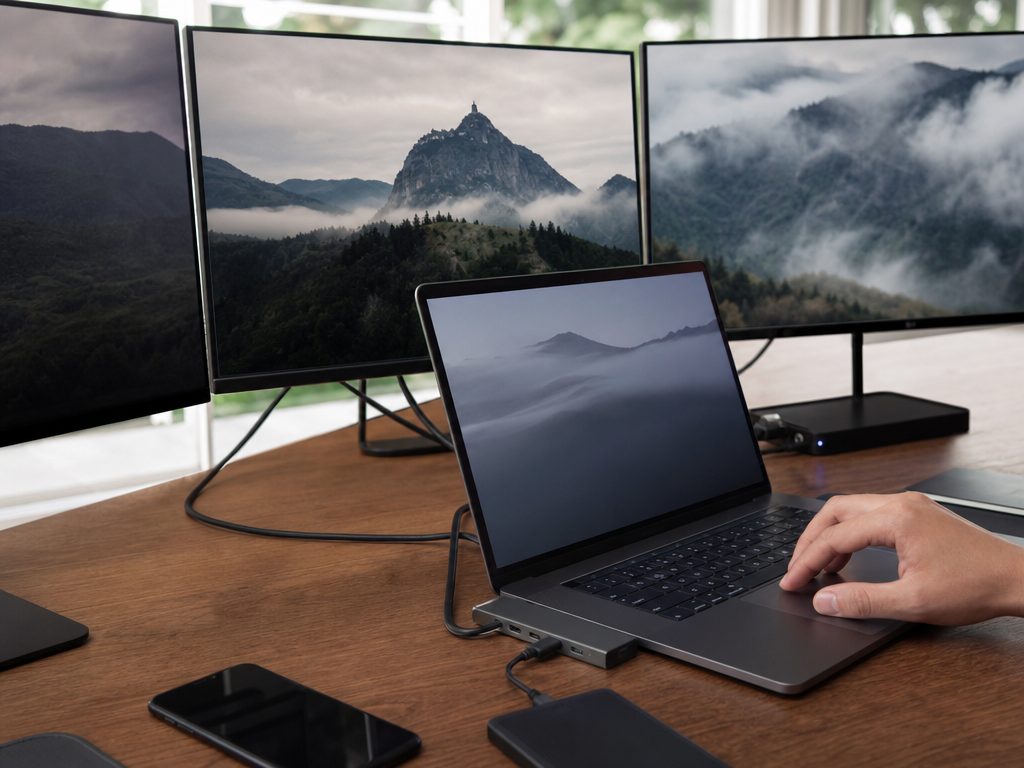
If you own a MacBook with a base M1, M2, or M3 chip, or if you want to run three external monitors on a base M4/M5 or Pro chip with the lid open, you cannot rely on native video outputs alone. To bypass these hardware limits, you must use a DisplayLink-enabled docking station or adapter. This setup requires installing the DisplayLink Manager software on macOS and granting it Screen Recording permissions in System Settings so the driver can capture and compress pixels to send to the external dock.
Sources: support.apple.com, www.synaptics.com
Step-by-Step Physical Connection and Cable Management
To begin the physical setup, place your three external monitors on your desk and connect them to their respective power sources. Turn on each display. Next, evaluate your docking station's power capabilities. Running three monitors alongside a laptop requires substantial power. Ensure your docking station is connected to a high-wattage power brick (typically 100W or higher) that supports USB Power Delivery (PD) so it can charge your laptop and power all connected peripherals simultaneously.
When connecting the video cables, use high-quality, certified cables. Avoid cheap, unbranded cables, as they often lack the shielding required to prevent signal interference and flickering. If you need to convert signals (e.g., from DisplayPort on your dock to HDMI on your monitor), always use active adapters rather than passive ones. Active adapters contain an internal chipset that actively converts the video signal, ensuring compatibility and stability. Once the cables are connected to the dock, plug the single USB-C or Thunderbolt cable from the dock into your laptop's designated high-bandwidth port.
Sources: vesa.org
Configuring and Arranging Your Virtual Desktop in Windows 11
Windows 11 is designed to automatically detect and install new hardware as soon as a physical connection is established. When you plug the displays in, your screens may blink or flicker briefly while the operating system registers the new hardware. Once detected, you must configure their virtual layout so your mouse pointer moves seamlessly across the screens. Right-click on an empty area of your desktop and select Display settings.
In the Display settings window, click the Identify button. A large number will briefly appear on each physical monitor. Drag and drop the corresponding numbered boxes in the settings window to match their actual physical layout on your desk. Ensure the edges of the boxes align perfectly; otherwise, your mouse cursor may get caught when moving between screens. Scroll down to 'Scale & layout' to adjust the DPI scaling for each monitor individually, ensuring text and icons appear at a consistent size across different resolutions. Finally, click on 'Advanced display' to verify and set the correct refresh rate (e.g., 60Hz or 144Hz) for each connected monitor.
Sources: support.microsoft.com

Configuring Displays in Windows 10 (and Navigating the Post-EOS Landscape)
For laptops running Windows 10, the manual detection and arrangement process follows a slightly different path. Click on the Start menu, go to Settings, and select System, then Display. In the Display window, click the Identify button, drag the numbered boxes to match your physical monitor arrangement, and click Apply. Under the 'Multiple displays' dropdown menu, ensure 'Extend these displays' is selected for each screen to create a continuous workspace.
It is critical to note that official support for Windows 10 ended on October 14, 2025. Because we are operating past this date, Microsoft no longer provides security updates, technical support, or software fixes for Windows 10. Running an unsupported operating system exposes your laptop to severe security vulnerabilities and malware risks. To maintain a secure, stable, and fully supported multi-monitor environment, transitioning to Windows 11 is highly recommended. Windows 11 also offers superior multi-monitor window management, such as remembering window locations when you disconnect and reconnect your docking station.
Sources: support.microsoft.com
Troubleshooting Common Multi-Monitor Issues
Even with high-end hardware, setting up three monitors can occasionally present technical hurdles. If one of your monitors remains black or displays a 'No Signal' message, first verify that the monitor is set to the correct input source (e.g., HDMI 1 or DisplayPort) using its physical menu buttons. If the input is correct, try power-cycling both the monitor and the docking station, or swap the cable with a known working one to rule out a faulty connection.
Screen flickering or random disconnects are usually caused by insufficient bandwidth or inadequate power. If your dock is powered solely by your laptop, plug the laptop's original power adapter directly into another port on the laptop to relieve the power load on the dock. If a monitor's resolution is capped at 1080p when it should be 4K, your port's bandwidth is likely saturated. You can resolve this by lowering the refresh rate of your other monitors (e.g., from 120Hz to 60Hz) or by using a dock that supports Display Stream Compression (DSC).
Sources: support.microsoft.com
Optimizing Your Triple-Monitor Workspace for Maximum Productivity
A triple-monitor setup is incredibly powerful, but only if it is optimized for ergonomics and workflow efficiency. For proper ergonomics, place your primary monitor directly in front of you at eye level to prevent neck strain. Position the two secondary monitors on either side, angling them slightly inward to create a curved viewing arc. This minimizes the need to turn your head excessively. The top of the screens should be at or slightly below eye level.
To manage your vast screen real estate, utilize software tools like Microsoft PowerToys, which includes a utility called FancyZones. FancyZones allows you to create custom grid layouts on each monitor, making it easy to snap windows into precise positions with a simple shift-drag. Additionally, customize your Windows taskbar settings by right-clicking the taskbar, selecting Taskbar settings, and choosing whether to display the taskbar on all screens or only on the monitor where the active window is open. This reduces visual clutter and streamlines navigation.
Sources: learn.microsoft.com
Future-Proofing Your Setup: Bandwidth, 4K, and High Refresh Rates
As display technology continues to advance, future-proofing your multi-monitor setup is a wise investment. If you plan to upgrade to 4K resolution or high-refresh-rate (120Hz+) monitors in the future, ensure your docking station and cables support the latest standards. Look for docks that feature Thunderbolt 4 or USB4, which provide the high bandwidth necessary to run multiple high-resolution screens without compromising on refresh rates or color depth.
Keep in mind that hardware compatibility standards, pricing, and specific port protocols change frequently. It is highly recommended to verify with your laptop manufacturer and dock provider to confirm that your specific laptop model supports the resolution and refresh rate requirements of your chosen monitors. When in doubt, consult the official technical documentation for your specific CPU, GPU, and docking station to ensure seamless compatibility and avoid costly hardware mismatches.
Sources: vesa.org, support.microsoft.com